
VMware Distributed Switches can be great in large environments or even small to mid sized environments that have quite a bit of VLANs. It makes adding portgroups/VMkernels easy because, the configuration is centralized and stored in vCenter with each host holding on to a portion of the config in case vCenter were to go down. Networking would still function but changes cant be made until vCenter is back online. I recently ran into an issue at one of my clients where we added new hosts to vCenter, configured them with networking (VMkernels/portgroups) and then needed to change their host names. This sounds like an easy task right? My client also had VMware Distributed Switches which meant that this process was going to be far from simple.
Warning: These hosts will lose iSCSI Port binding/Storage connectivity momentarily. This will be explained in more detail below.
Here are the steps I took to cleanly associate my newly named hosts back into my VDS without any errors or worries of unsupported configurations :
- Select one of the hosts from that we will rename and document its VMNIC/VMkernel configuration in VDS. For my client’s examples, VMNIC0/1 and VMkernel 1, 2, 4 are what we will be working with.
- Select the host that was documented and place it in maintenance mode. The end result should be a host in maintenance mode running no production VMs or workloads.
- Right click the host and disconnect it from vCenter. This should make the host name of the host gray and italicized. It should also say disconnected.
- Right click and remove the host from inventory. Please note that this will completely remove the host from inventory. It will also remove its performance history and task/event history in vCenter.
- Right click the cluster and select add host.. (This step is assuming the host name has an associated A record in DNS)
- Add the host with the root/password, assign it licenses and click next.
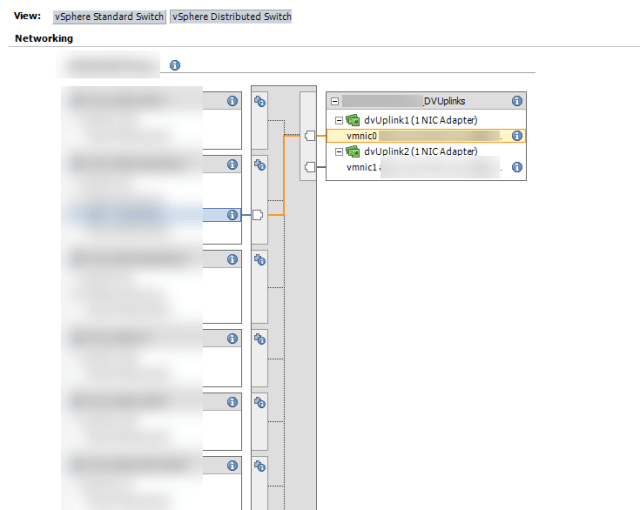
- Navigate to Configuration -> Networking -> vSphere Distributed Switch and you will see the following :

- Even if we go to add the VMNICs back, they aren’t present in the list. The VMNICs we are looking for are VMNIC0 and VMNIC1.

- Let’s now navigate to Inventory-> Networking -> Right click the VDS that the hosts were assigned to -> Select Add Hosts.
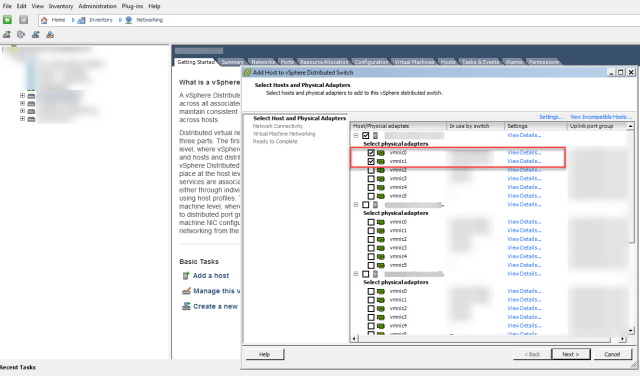
- The first host in the list should be the host we re-added with the new host name and it should have it’s NICs checked. You may click Next all the way and complete the association of the host to its VDS.
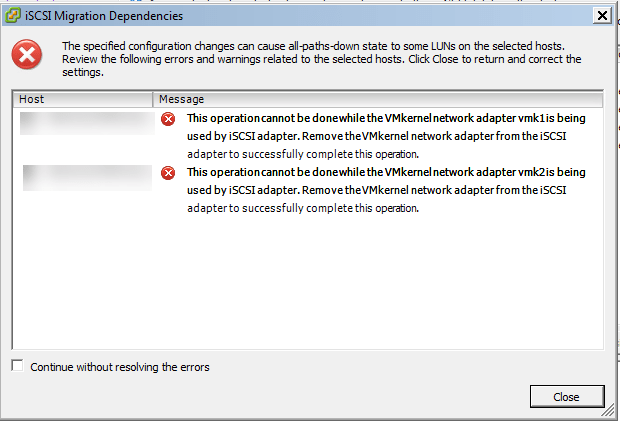
- If this VDS contains VMKernels for Storage and these VMNICs are being used for storage, you will see the following errors :
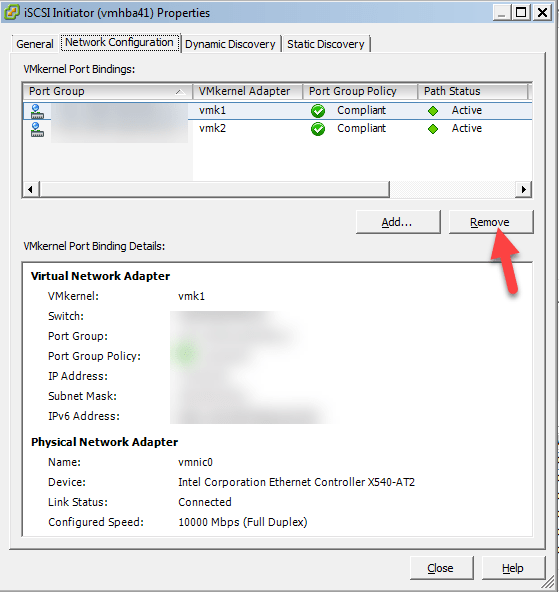
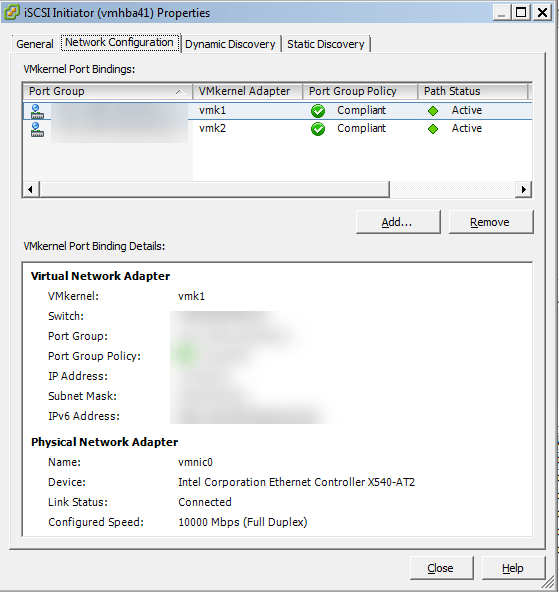
- After seeing this error, I decided to manually disconnect my iSCSI Port bindings by going to Configuration -> Storage Adapters -> Properties of iSCSI Software adapter -> Network Configuration -> remove one at a time. This will cause the host to lose its storage!
- Go back to Networking -> Right click the VDS -> add hosts -> add the appropriate host and click Next.
- Verify Networking and VMNIC configuration is correct :
- Also, note that the warning message is gone. If the VMKernels/VMNIC assignments look good then proceed back to Configuration -> Storage adapters -> and add back the iSCSI Port bindings. Verify iSCSI configuration looks correct (should have saved) and click OK. If prompted to re-scan HBAs/adapters choose yes. If not prompted, right click the host and re-scan HBAs.
- At this point, verify the host has connectivity to storage and all paths have been brought back online. If the host configuration looks good then lets take it out of maintenance mode and migrate a low SLA VM to it validate it is ready to serve VMs.
